Replacing the Heater Core


Antifreeze in the passenger compartment?  If so, it's time to replace your heater core.  Brace yourself for a several hundred dollar repair bill ($916 from dealer) or a big do it yourself project.  Below are factory service manual instructions with additional links to pictures and advice on how to do it.

I found myself in this position because I drilled a hole from the engine bay to the passenger compartment in an ill advised place.  OOPS!  

Go to Pictures

Go to Instructions

Go to Notes


Pictures:

Click on a picture to enlarge it to 640x480


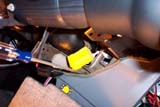
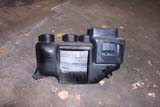
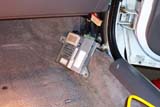
This is the body computer.  It is located behind the trim panel on the passenger floorboard.
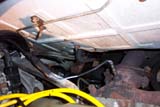
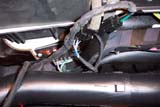
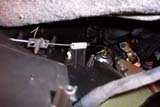
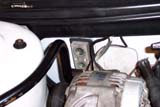
Behind the alternator is the A/C expansion valve.  
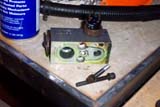
To remove the A/C explansion valve, you need a socket with a T-30 torx bit.
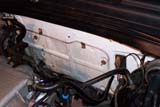
The A/C-Heater assembly is held on with 4 bots shown in this picture.  (One is behind the alternator.


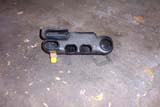
The black tube in the middle of the picture is the A/C condensate drain tube.
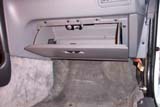
The glove box
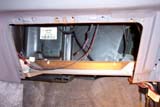
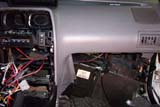
Area behind the glove box.
Demister hoses above glove box


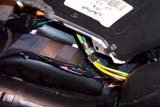
Wires above glove box
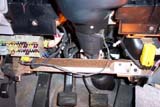
Brace under steering wheel
Side view of upper heater duct from driver's side floor panel
Lower heater duct


Upper heater duct
Upper heater duct (second view)
Temperature control cable (Note that the picture is upside down as you will be when disconnecting it.)
Demister hose connector behind radio


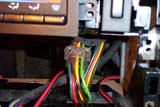
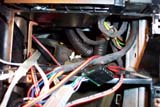
Wires behind radio  (Note the two corrugated hoses.  These connect to the top of the A/C-Heater assembly and must be disconnected before it can be removed.)
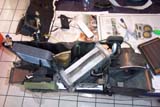
A/C-Heater assembly part way out.  The trim hanging down in the middle of the picture must be bent outward while the assembly is rotated out the passenger side.
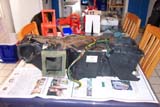
A/C-Heater assembly as it would be viewed from the passenger compartment
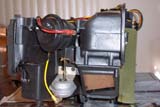
A/C-Heater assembly as it would be viewed from the engine bay


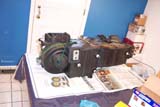
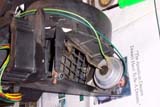
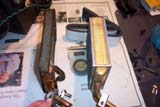
End view of A/C-Heater assembly
Other end of A/C-Heater assembly
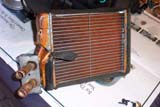
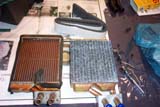
Old heater core  (Note the hole on the body of the core above the connectors.)
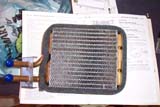
New Heater Core.
GDI 399142
$29 from PepBoys


This is a side by side view of the old and new heater cores.
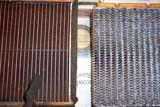
Note that the cell size of the new core is bigger than that of the old one.
Note that the new core is almost twice as think as the old one.  Amazingly it still fits.
The new heater core is installed in the upper left of the picture.  The middle piece you see is the A/C evaporator.


Instructions:

The Chrysler Factory Service Manual Instructions appear below in black.  My comments/advice are in brown next to the appropriate step.

Chrysler Factory Service Manual Instructions (24-55)
AG, AJ BODY PROCEDURE:
WARNING:  IF EQUIPPED WITH A/C, THE REFRIGERATION SYSTEM MUST BE COMPLETELY DISCHARGED BEFORE PROCEEDING WITH THIS OPERATION.  REFER TO DICHARGIN REFRIGERATION SYSTEM IN THIS GROUP.

1.  Disconnect the battery negative cable.

2.  Drain the coolant from the cooling system.

3.  Remove the air-conditioner expansion valve (if equipped)
You will need to use a socket wrench to remove the hoses to this unit.  After those have been removed, use a socket with a T-30 torx bit to remove the valve from the A/C-heater assembly.  You will not be able to do this with a regular torx driver because the alternator is in your way.  After trying for 15 minutes, I gave up, went to Pep Boys, bought and bought a torx socket set.  Using that set, the bolts came out quickly and easily.

4.  Disconnect the heater hoses from the heater core.  Then plug or cap the tubes on heater core.  This will prevent spilling coolant into the interior of vehicle during unit removal.

5.  Remove the condensate drain tube.
If you forget to do this, you will find it on the ground under your vehicle when you are done.

6.  Disconnect the A/C-heater vacuum supply line from vacuum supply nipple (in the engine compartment.)
This is the little hose you see in the engine bay that enters the firewall right next to the heater hoses.

7.  Remove the four A/C-heater assembly-to-dash panel attaching nuts.
You will need an box end wrench to get at the nut behind the alternator.  There isn't enough room to maneuver a socket wrench and you won't be able to grab the nut with a regular pair of pliars.  The box end wrench is nice because you can slip it over the nut, push it up to the firewall, and rotate it with your finger tips.

8.  Remove the passenger side front seat.
The bolts will likely be VERY tight.  I though I was going to break bones in my hand pushing on these.  You'll want deep sockets for the back nuts due to the protrusion of the bolts.  I also recommend a short to medium extension and some WD40 to help  loosen the bolts/nuts.

9.  Remove the kick panel/sill cover at right door opening.

10.  Remove the body computer located at the lower right section of the right front door pillar.

11.  Remove the glove box assembly.

12.  Remove the carpeted panels from both sides of the console.

13.  Un-clip the raidio antenna cable from the metal support located behind and below the flove box opening.

14.  Instrument panel removal is not necessary to remove the A/C-heater assembly from the vehicle.  Although, part of the lower instrument panel must be cut. The cut line is stamped (indented) into the right outer side of the instrument panel padding (outboard of the glove box opening).  Using a hacksaw blade, cut the instrument panel padding along the indented line from point A to point B.  CUT THE PLASTIC ONLY.  Do not cut the metal support behind the instrument panel padding.
This is rather frustrating because it is hard to get a clean cut.  Just remember that the trim will completely cover up the mess you've made.  You can use a hacksaw for part of it however the saw itself is too big to use on the right side of the panel by the door.  I used a pair of vice grips to hold the actual hack saw blade and cut the panel that way.  Not an elegant solution but an effective one.

15.  Remove the metal support behind and below the glove box opening, and the previously cut piece of the instrument panel that is riveted to it.

16.  Remove the radio choke, security alarm module, and the lamp outage module from above the glove box opening (if equipped).
I actually recommend removing the radio completely at this point in order to access the hoses behind it.

17.  Remove the plastic cover under the steering column.

18.  Remove the metal support under the steering column.

19.  AJ body only:  Remove the under-panel silencer pad from under the glove box opening.

20.  Remove the lower heat distribution duct (3 screws).

21.  Remove the air distribution duct through the opening at the left side of the instrument panel.
In addition to the air duct, their are two air duct hoses that attach to the top of the A/C-heater assembly.  Disconnect these through the opening where the radio sits (after removing the radio).

22.  Reach through the glove box opening and disconnect the demister hoses from the top of the A/C-heater assembly.
Unless I really missed something, this step was not very representative of what was required.  In the end, I removed my stereo and the two accessory slots below it to get behind the AC controls.  There is a plug that connects all of the demister hoses back there which can be disconnected using two pairs of pliars, a couple of screw drivers, and some patience.  I was unable to find any quick way to diconnect these hoses.

23.  Disconnect the temperature control cable from the bottom of the A/C-heater assembly and position out of the way.
You may find that this is surprising difficult to reconnect.  If so, spin the cable bracket around so that the tabs are facing you.  The cable should be much easier to insert in that orientation.

24.  Disconnect wiring at the blower motor and fin-sensing cycling clutch switch electrical connectors.

25.  Un-plug the antenna cable from the radio.

26.  Remove the metal (A/C-heater-to-instrument panel) hanger strap from the uppper part of the A/C-heater assembly.
Don't forget that that this is here when reinstalling.  It will get caught on the top of the assembly and prevent you from getting the back of the A/C-heater housing to lay flush with the firewall.  After 40 minutes of pushing, swearing, and more swearing, you'll see this, move it, and everything will go back together quickly.

27.  Roll back the floor carpeting from under the A/C-heater assembly far enough to avoid restricting unit removal.

28.  Remove the A/C-heater assembly through the opening on the right side of the console, and remove unit from vehicle.  The instrument panel (to the left side of the glove box opening) must be slightly folded back to remove the unit from the vehicle.  If wrinkles appear in the instrument panel after the unit has been installed, they may be removed using a heat gun.  Refer to Installation AG, AJ Body for instructions.
"Folded back slightly" is an understatement.  It will be folded back at almost a 90 degree angle.  You will fight this beast out of the car and be almost convinced that it isn't coming out.  Then it will pop free.  I had my wife pull back on the instrument panel while I worked the end of the unit out as far as it would go.  (not far)  Then she pulled on the unit while I rotated and pushed if from the driver's side.  Some scarry poping sounds occured and then it came out.
Reinserting the unit was just as bad as getting it out.  My wife pushed from the passenger's side.  I twisted and pulled from the driver's side.  When the unit was clearly caught on a piece of metal on the passenger's side of the console, I used a screwdriver to pry the plastic away from the metal while my wife pushed.  There were more popping sounds but it went in.

To install, reverse steps 28 through 13.  If wrinkles have appeared in the instrument panel, apply low heat from a heat gun over the wrinkled area.  Do not overheat the instrument panlel padding or the surrounding area.  Reverse steps 12 through 1.  If equipped with A/C, evacuate and charge the refrigerant system.
 

Notes: